Xamarin.Tip – Create an Initials Circle View

A while back, I put up a helpful Xamarin.Tip on how to create a simple CircleView in Xamarin.Forms for a BadgeView control – Xamarin.Controls – BadgeView

Since then, I’ve used this simple concept to create some more useful controls that are unique and dynamic in their own way. In this post, we will look at using the CircleView to create an InitialsCircleView. This view is a simple Xamarin.Forms control to show a person’s initials. It is extremely useful in place of user avatars or profile pictures and can add a nice touch to your User Interface without much work at all.

Let’s start by re-iterating how to build a simple CircleView:

In your Xamarin.Forms project, create a new class:

CircleView.cs

public class CircleView : BoxView
{
    public static readonly BindableProperty CornerRadiusProperty = BindableProperty.Create(nameof(CornerRadius), typeof(double), typeof(CircleView), 0.0);

    public double CornerRadius
    {
        get { return (double)GetValue(CornerRadiusProperty); }
        set { SetValue(CornerRadiusProperty, value); }
    }

    public CircleView()
    {
    }
}

And create your native renderers:

AndroidCircleViewRenderer.cs

public class CircleViewRenderer : BoxRenderer
{
    private float _cornerRadius;
    private RectF _bounds;
    private Path _path;

    public CircleViewRenderer(Context context)
        : base(context)
    {

    }

    protected override void OnElementChanged(ElementChangedEventArgs<BoxView> e)
    {
        base.OnElementChanged(e);

        if (Element == null)
        {
            return;
        }
        var element = (CircleView)Element;

        _cornerRadius = TypedValue.ApplyDimension(ComplexUnitType.Dip, (float)element.CornerRadius, Context.Resources.DisplayMetrics);

    }

    protected override void OnSizeChanged(int w, int h, int oldw, int oldh)
    {
        base.OnSizeChanged(w, h, oldw, oldh);
        if ((w != oldw && h != oldh) || _bounds == null)
        {
            _bounds = new RectF(0, 0, w, h);
        }

        _path = new Path();
        _path.Reset();
        _path.AddRoundRect(_bounds, _cornerRadius, _cornerRadius, Path.Direction.Cw);
        _path.Close();
    }

    public override void Draw(Canvas canvas)
    {
        canvas.Save();
        canvas.ClipPath(_path);
        base.Draw(canvas);
        canvas.Restore();
    }
}

iOSCircleViewRenderer.cs

public class CircleViewRenderer : BoxRenderer
{
    protected override void OnElementChanged(ElementChangedEventArgs<BoxView> e)
    {
        base.OnElementChanged(e);

        if (Element == null)
            return;

        Layer.MasksToBounds = true;
        Layer.CornerRadius = (float)((CircleView)Element).CornerRadius / 2.0f;
    }
}

Okay, cool we can draw circles in Xamarin.Forms easily with

<suave:CircleView .../>

So now let’s build a Xamarin.Forms component on top of this for our InitialsCircleView. The key pieces to making this view unique and cool is:

  • Circle color
  • Font size
  • Font color
  • Font family
  • Circle Radius (in case you don’t really want a circle)

Let’s write the ContentView in XAML, but you could easily do it in C# too:

InitialsCircleView.xaml

<ContentView xmlns="http://xamarin.com/schemas/2014/forms" 
    xmlns:x="http://schemas.microsoft.com/winfx/2009/xaml" 
    xmlns:components="clr-namespace:SuaveControls.Components"
    x:Class="SuaveControls.Components.InitialsCircleView">
    <ContentView.Content>
        <Grid x:Name="Container">
            <components:CircleView x:Name="Circle" Margin="16" HorizontalOptions="Fill" VerticalOptions="Fill" Color="{Binding CircleColor}" CornerRadius="{Binding CornerRadius}"/>
            <Label x:Name="InitialsLabel" VerticalOptions="Center" HorizontalOptions="Center" HorizontalTextAlignment="Center" TextColor="{Binding TextColor}" Font="{Binding Font}" FontSize="{Binding FontSize}" />
        </Grid>
    </ContentView.Content>
</ContentView>

So now we have the layout of our InitialsCirlceView, let’s look at the code behind to see how we apply all these different properties and bind them to this internal view:

InitialsCircleView.xaml.cs

public partial class InitialsCircleView : ContentView
{
    public static BindableProperty CircleColorProperty = BindableProperty.Create(nameof(CircleColor), typeof(Color), typeof(InitialsCircleView), Color.White);
    public static BindableProperty TextColorProperty = BindableProperty.Create(nameof(TextColor), typeof(Color), typeof(InitialsCircleView), Color.White);
    public static BindableProperty FontSizeProperty = BindableProperty.Create(nameof(FontSize), typeof(int), typeof(InitialsCircleView), 14);
    public static BindableProperty FontProperty = BindableProperty.Create(nameof(Font), typeof(Font), typeof(InitialsCircleView), Font.Default);
    public static BindableProperty CornerRadiusProperty = BindableProperty.Create(nameof(CornerRadius), typeof(double), typeof(InitialsCircleView), 0.0, propertyChanged: (bindable, oldVal, newVal) =>
    {
        var initialsView = bindable as InitialsCircleView;
        if (initialsView != null)
            initialsView.UpdateCornerRadius((double)newVal);
    });
    public static BindableProperty NameProperty = BindableProperty.Create(nameof(Name), typeof(string), typeof(InitialsCircleView), string.Empty, 
    propertyChanged: (bindable, oldVal, newVal) =>
    {
        var initialsView = bindable as InitialsCircleView;
        if (initialsView != null)
            initialsView.UpdateTextWithName(newVal?.ToString());
    });

    public double CornerRadius
    {
        get
        {
            return (double)GetValue(CornerRadiusProperty);
        }
        set
        {
            SetValue(CornerRadiusProperty, value);
        }
    }
    public string Name
    {
        get
        {
            return (string)GetValue(NameProperty);
        }
        set
        {
            SetValue(NameProperty, value);
        }
    }
    public int FontSize
    {
        get
        {
            return (int)GetValue(FontSizeProperty);
        }
        set
        {
            SetValue(FontSizeProperty, value);
        }
    }
    public Font Font
    {
        get
        {
            return (Font)GetValue(FontProperty);
        }
        set
        {
            SetValue(FontProperty, value);
        }
    }
    public Color CircleColor
    {
        get
        {
            return (Color)GetValue(CircleColorProperty);
        }
        set
        {
            SetValue(CircleColorProperty, value);
        }
    }
    public Color TextColor
    {
        get
        {
            return (Color)GetValue(TextColorProperty);
        }
        set
        {
            SetValue(TextColorProperty, value);
        }
    }


    public InitialsCircleView()
    {
        InitializeComponent();
        Container.BindingContext = this;
    }

    /// <summary>
    /// Updates the name of the text with.
    /// </summary>
    /// <param name="name">Name.</param>
    private void UpdateTextWithName(string name)
    {
        if (string.IsNullOrEmpty(name))
            return;

        var separateWords = name.Split(' ');
        if(separateWords.Length > 0)
        {
            var initialsArray = separateWords.Select(word => word[0].ToString().ToUpper()).ToArray(); // array of string of initials upper cased
            if(initialsArray.Length > 1)
            {
                // grab the first and last
                initialsArray = new string[2] { initialsArray[0], initialsArray[initialsArray.Length - 1] };
            }
            var initialsString = string.Join(string.Empty, initialsArray);
            InitialsLabel.Text = initialsString;
        }
        else
        {
            InitialsLabel.Text = string.Empty;
        }
    }

    /// <summary>
    /// Updates the corner radius.
    /// </summary>
    /// <param name="radius">Radius.</param>
    private void UpdateCornerRadius(double radius)
    {
        Circle.CornerRadius = radius;
    }
}

We have a few properties that are directly bound to the subviews in the XAML which is facilitated by applying the Container.BindingContext = this;.

We also have a property for Name which invokes the internal UpdateTextWithName method. This in turn takes the name of a person, grabs the initials, and sets the text of the Label to it. So we can then use it by just passing a person or thing’s name and let it figure out the initials naturally. So if we say:

var initialsCirle = new InitialsCirlceView
{
    Name = "Alex Dunn"
}

The output will be “AD” in the cirlce.

Here’s how you can now use it in your XAML:

MainPage.xaml

...
<components:InitialsCircleView 
    CircleColor="Red"
    FontSize="32" 
    Name="Alex Dunn" 
    VerticalOptions="Center" 
    HorizontalOptions="Center" 
    TextColor="White" 
    CornerRadius="90" 
    WidthRequest="120" 
    HeightRequest="120"/>

...

Here’s what it looks like!
InitialsCircle

You can also create XAML Styles for it instead of managing all the colors and font options everywhere you use it.


If you like what you see, don’t forget to follow me on twitter @Suave_Pirate, check out my GitHub, and subscribe to my blog to learn more mobile developer tips and tricks!

Interested in sponsoring developer content? Message @Suave_Pirate on twitter for details.

Xamarin.Tip – Add Easter Eggs on Shake

Here’s a quick and fun tip to add a little flare to your Xamarin applications whether in Xamarin.Forms or Xamarin Native! In a later post, we will also look at how to use the Shake Gesture to create useful tools for yourself as a developer, or for your users! This fun post is the foundation for the more serious stuff and will show you how to use the Shake Recognition to do just about anything you want.

In order to handle shake gestures natively, we have to write some Xamarin Native code, but we will assume you are using Xamarin.Forms. We’ll start with Android.

Android Shake Detection

Android is the more complicated between the two major platforms. The process is basically this:

  • Listen to Accelerometer events
  • Check value changes of the x, y, and z axis
  • Compare deltas against a threshold to determine if motion is a shake
  • Execute the fun stuff!

Let’s do this in the MainActivity since every Xamarin.Forms application needs at least that. If you are using Xamarin Native or a mix, then you may want to implement this elsewhere such as your Application class or abstracted with a shared BaseActvity or add it as a field to the Activities you want it in.

MainActivity.cs

/// <summary>
/// Main Activity and entry point for Xamarin.Forms
/// </summary>
public class MainActivity : Activity, Android.Hardware.ISensorEventListener
{
    #region Shake properties
    bool hasUpdated = false;
    DateTime lastUpdate;
    float lastX = 0.0f;
    float lastY = 0.0f;
    float lastZ = 0.0f;

    const int ShakeDetectionTimeLapse = 250;
    const double ShakeThreshold = 800;
    #endregion


    /// <summary>
    /// Sets up the internal lifecycle for registering views and the shake detection
    /// </summary>
    /// <param name="savedInstanceState">Saved instance state.</param>
    protected override void OnCreate(Bundle savedInstanceState)
    {
        base.OnCreate(savedInstanceState);

        // all the other set up stuff here

        // shake management set up
        // Register this as a listener with the underlying service.
        var sensorManager = GetSystemService(SensorService) as Android.Hardware.SensorManager;
        var sensor = sensorManager.GetDefaultSensor(Android.Hardware.SensorType.Accelerometer);
        sensorManager.RegisterListener(this, sensor, Android.Hardware.SensorDelay.Game);

    }


    #region Android.Hardware.ISensorEventListener implementation

    /// <summary>
    /// Handles when the sensor range changes
    /// </summary>
    /// <param name="sensor">Sensor.</param>
    /// <param name="accuracy">Accuracy.</param>
    public void OnAccuracyChanged(Android.Hardware.Sensor sensor, Android.Hardware.SensorStatus accuracy)
    {
    }

    /// <summary>
    /// Detects sensor changes and is set up to listen for shakes.
    /// </summary>
    /// <param name="e">E.</param>
    public async void OnSensorChanged(Android.Hardware.SensorEvent e)
    {
        if (e.Sensor.Type == Android.Hardware.SensorType.Accelerometer)
        {
            var x = e.Values[0];
            var y = e.Values[1];
            var z = e.Values[2];

            // use to check against last time it was called so we don't register every delta
            var currentTime = DateTime.Now;
            if (hasUpdated == false)
            {
                hasUpdated = true;
                lastUpdate = currentTime;
                lastX = x;
                lastY = y;
                lastZ = z;
            }
            else
            {
                if ((currentTime - lastUpdate).TotalMilliseconds > ShakeDetectionTimeLapse)
                {
                    var diffTime = (float)(currentTime - lastUpdate).TotalMilliseconds;
                    lastUpdate = currentTime;
                    var total = x + y + z - lastX - lastY - lastZ;
                    var speed = Math.Abs(total) / diffTime * 10000;

                    if (speed > ShakeThreshold)
                    {
                        // We have a shake folks!
                        await EasterEggAsync();
                    }

                    lastX = x;
                    lastY = y;
                    lastZ = z;
                }
            }
        }
    }

    /// <summary>
    /// Execute the easter egg async.
    /// </summary>
    protected virtual async Task EasterEggAsync()
    {
        // HEY OVER HERE! DO SOMETHING COOL!
    }
#endregion

}

Now all you have to do is add whatever your easter egg logic is in the EasterEggAsync method! In this method, you can also track what the current Xamarin.Forms Page is visible by tracking the App.Current.MainPage to add some context to the page your in.

Now let’s look at the iOS implementation.

iOS Shake Detection

iOS makes this process a whole lot easier. We don’t have to do any crazy accelerometer calculations, state tracking, or any of the gross stuff above for Android. Instead, we simply use the built in Gesture API from UIKit and register that we are listening to these types of gestures in the AppDelegate:

AppDelegate.cs

[Register("AppDelegate")]
public class AppDelegate : UIApplicationDelegate
{

    public override UIWindow Window { get; set; }
    public static AppDelegate Current { get; private set; }


    public override bool FinishedLaunching(UIApplication application, NSDictionary launchOptions)
    {
        // Allow shake detection
        UIApplication.SharedApplication.ApplicationSupportsShakeToEdit = true;

        // make this more accessible
        Current = this;
        Forms.Init();

        // we did it! the app is launched!
        return true;
    }
}

Now that we have registered with the UIApplication.SharedApplication.ApplicationSupportsShakeToEdit, we can start overriding the gesture recognizer. If you’re using Xamarin.Forms, you can do this right in the AppDelegate but if you’re not, then you can use this override method in any ViewController or even any sub-UIView class!

/// <summary>
/// Handles when a general motion has ended on the view controller. 
/// We use this to detect the shake of the phone to execute and easter egg
/// </summary>
/// <param name="motion">Motion.</param>
/// <param name="evt">Evt.</param>
public override async void MotionEnded(UIEventSubtype motion, UIEvent evt)
{
    Console.WriteLine("Motion detected");
    if (motion == UIEventSubtype.MotionShake)
    {
        Console.WriteLine("and was a shake");

        await EasterEggAsync();
    }
}

/// <summary>
/// Execute the easter egg async.
/// </summary>
protected virtual async Task EasterEggAsync()
{
    // HEY OVER HERE! DO SOMETHING COOL!
}

// if you're in the view controller then you also need to:

public override bool CanBecomeFirstResponder
{
    get
    {
        return true;
    }
}

/// <summary>
/// Enables the first responder set to allow for shake detection
/// </summary>
/// <param name="animated">If set to <c>true</c> animated.</param>
public override void ViewWillAppear(bool animated)
{
    base.ViewWillAppear(animated);
    this.BecomeFirstResponder();
    // .. other logic
}

Doing this enabled the gesture to be picked up at the application level or in the current UIViewController. You need to ensure the CanBecomeFirstResponder is true and that you call BecomeFirstResponder() on appearing so that the MotionEnded override can be called.

Once again, just fill in the EasterEggAsync method with whatever easter egg you want to invoke!

Conclusion

Easter eggs can make a neat experience in your mobile applications, but using this shake gesture can also help make debugging easier as well as give a QA team the chance to quickly move through stories in the app. In a future post, we will talk more about these possibilities and the benefits of building testing and development options into your apps for testing rather than user-focused and fun easter eggs.


If you like what you see, don’t forget to follow me on twitter @Suave_Pirate, check out my GitHub, and subscribe to my blog to learn more mobile developer tips and tricks!

Interested in sponsoring developer content? Message @Suave_Pirate on twitter for details.

Xamarin.Tip – Build Your Own CheckBox in Xamarin.Forms

So how many times have you looked this up? Maybe tried an open source control that didn’t quite work the way you wanted or was super restricted? Just used two different images and switch their IsVisible flag depending if it was tapped or not?
Screw that.

Here’s how you can build your own nice looking checkboxes for iOS and Android with Xamarin.Forms.

Getting Everything Together

So Android has a built in Checkbox view – so the decision on how to handle that is easy. However, iOS doesn’t like checkboxes… note sure why, but they don’t and don’t have a good built in UIControl for it. You could build your own, but I would suggest using BEMCheckbox: https://github.com/Boris-Em/BEMCheckBox

This thing looks good, works well, is super flexible, and well supported. Even better, our super awesome community has wrapped it in a good binding library and stuck it on NuGet!

GitHub: https://github.com/saturdaymp/XPlugins.iOS.BEMCheckBox
NuGet: https://www.nuget.org/packages/SaturdayMP.XPlugins.iOS.BEMCheckBox/

Let’s focus on using this for the iOS renderer, and get started building this damn thing once and for all.

The Xamarin.Forms Side

We’re going to need a bunch of properties for colors for different states, as well as a Command and Event for handling when the check changes. Here’s the class to encapsulate all that:

Checkbox.cs

using System;
using System.Windows.Input;
using Xamarin.Forms;
...

/// <summary>
/// A xamarin.forms custom checkbox control that will use native renderers under the hood
/// </summary>
public class Checkbox : View
{
    public event EventHandler OnCheckChanged;

    public static BindableProperty OutlineColorProperty = BindableProperty.Create(nameof(OutlineColor), typeof(Color), typeof(Checkbox), Color.Black);
    public static BindableProperty InnerColorProperty = BindableProperty.Create(nameof(InnerColor), typeof(Color), typeof(Checkbox), Color.White);
    public static BindableProperty CheckColorProperty = BindableProperty.Create(nameof(CheckColor), typeof(Color), typeof(Checkbox), Color.Black);
    public static BindableProperty CheckedOutlineColorProperty = BindableProperty.Create(nameof(CheckedOutlineColor), typeof(Color), typeof(Checkbox), Color.Black);
    public static BindableProperty CheckedInnerColorProperty = BindableProperty.Create(nameof(CheckedInnerColor), typeof(Color), typeof(Checkbox), Color.White);
    public static BindableProperty IsCheckedProperty = BindableProperty.Create(nameof(IsChecked), typeof(bool), typeof(Checkbox), false, BindingMode.TwoWay);
    public static BindableProperty CheckedCommandProperty = BindableProperty.Create(nameof(CheckedCommand), typeof(ICommand), typeof(Checkbox), null);
    public static BindableProperty CheckedCommandParameterProperty = BindableProperty.Create(nameof(CheckedCommandParameter), typeof(object), typeof(Checkbox), null);

    public object CheckedCommandParameter
    {
        get
        {
            return GetValue(CheckedCommandParameterProperty);
        }
        set
        {
            SetValue(CheckedCommandParameterProperty, value);
        }
    }
    public ICommand CheckedCommand
    {
        get
        {
            return (ICommand)GetValue(CheckedCommandProperty);
        }
        set
        {
            SetValue(CheckedCommandProperty, value);
        }
    }
    public bool IsChecked
    {
        get
        {
            return (bool)GetValue(IsCheckedProperty);
        }
        set
        {
            SetValue(IsCheckedProperty, value);
        }
    }
    public Color CheckColor
    {
        get
        {
            return (Color)GetValue(CheckColorProperty);
        }
        set
        {
            SetValue(CheckColorProperty, value);
        }
    }
    public Color InnerColor
    {
        get
        {
            return (Color)GetValue(InnerColorProperty);
        }
        set
        {
            SetValue(InnerColorProperty, value);
        }
    }
    public Color OutlineColor
    {
        get
        {
            return (Color)GetValue(OutlineColorProperty);
        }
        set
        {
            SetValue(OutlineColorProperty, value);
        }
    }
    public Color CheckedInnerColor
    {
        get
        {
            return (Color)GetValue(CheckedInnerColorProperty);
        }
        set
        {
            SetValue(CheckedInnerColorProperty, value);
        }
    }
    public Color CheckedOutlineColor
    {
        get
        {
            return (Color)GetValue(CheckedOutlineColorProperty);
        }
        set
        {
            SetValue(CheckedOutlineColorProperty, value);
        }
    }

    public void FireCheckChange()
    {
        OnCheckChanged?.Invoke(this, new CheckChangedArgs
        {
            IsChecked = IsChecked
        });
    }

    public class CheckChangedArgs : EventArgs
    {
        public bool IsChecked { get; set; }
    }
}

Now that we have a component set up to manage all the different colors and handle the checked state and events, we need to create native renderers to use and update these!

Let’s start with Android.

Android Checkbox Renderer

Android has a built in CheckBox control, so we can use that directly in our renderer. Here’s what that might look like:

AndroidCheckboxRenderer.cs

using System;
using Android.Content;
using Android.Content.Res;
using Android.Support.V7.Widget;
using Android.Widget;
using Xamarin.Forms;
using Xamarin.Forms.Platform.Android;
...

/// <summary>
/// Xamarin.Forms custom renderer for the Checkbox control
/// </summary>
public class CheckboxRenderer : ViewRenderer<Checkbox, AppCompatCheckBox>, CompoundButton.IOnCheckedChangeListener
{
    private const int DEFAULT_SIZE = 28;

    public CheckboxRenderer(Context context) : base(context)
    {
    }

    /// <summary>
    /// Used for registration with dependency service to ensure it isn't linked out
    /// </summary>
    public static void Init()
    {
        // intentionally empty
    }

    /// <summary>
    /// Update element bindable property from event
    /// </summary>
    /// <param name="buttonView">Button view.</param>
    /// <param name="isChecked">If set to <c>true</c> is checked.</param>
    public void OnCheckedChanged(CompoundButton buttonView, bool isChecked)
    {
        ((IViewController)Element).SetValueFromRenderer(Checkbox.IsCheckedProperty, isChecked);
        Element.CheckedCommand?.Execute(Element.CheckedCommandParameter);
    }

    public override SizeRequest GetDesiredSize(int widthConstraint, int heightConstraint)
    {
        var sizeConstraint = base.GetDesiredSize(widthConstraint, heightConstraint);

        if (sizeConstraint.Request.Width == 0)
        {
            var width = widthConstraint;
            if (widthConstraint <= 0)
            {
                System.Diagnostics.Debug.WriteLine("Default values");
                width = DEFAULT_SIZE;
            }
            else if (widthConstraint <= 0)
            {
                width = DEFAULT_SIZE;
            }

            sizeConstraint = new SizeRequest(new Size(width, sizeConstraint.Request.Height),
                new Size(width, sizeConstraint.Minimum.Height));
        }

        return sizeConstraint;
    }


    /// <summary>
    /// Called when the control is created or changed
    /// </summary>
    /// <param name="e">E.</param>
    protected override void OnElementChanged(ElementChangedEventArgs<Checkbox> e)
    {
        base.OnElementChanged(e);
        if (e.NewElement != null)
        {
            if (Control == null)
            {
                var checkBox = new AppCompatCheckBox(Context);

                if (Element.OutlineColor != default(Color))
                {
                    var backgroundColor = GetBackgroundColorStateList(Element.OutlineColor);
                    checkBox.SupportButtonTintList = backgroundColor;
                    checkBox.BackgroundTintList = GetBackgroundColorStateList(Element.InnerColor);
                    checkBox.ForegroundTintList = GetBackgroundColorStateList(Element.OutlineColor);

                }
                checkBox.SetOnCheckedChangeListener(this);
                SetNativeControl(checkBox);
            }

            Control.Checked = e.NewElement.IsChecked;
        }
    }


    protected override void OnElementPropertyChanged(object sender, System.ComponentModel.PropertyChangedEventArgs e)
    {
        base.OnElementPropertyChanged(sender, e);
        if (e.PropertyName == nameof(Element.IsChecked))
        {
            Control.Checked = Element.IsChecked;
        }
        else
        {
            var backgroundColor = GetBackgroundColorStateList(Element.CheckColor);
            Control.SupportButtonTintList = backgroundColor;
            Control.BackgroundTintList = GetBackgroundColorStateList(Element.InnerColor);
            Control.ForegroundTintList = GetBackgroundColorStateList(Element.OutlineColor);
        }
    }

    /// <summary>
    /// Sync from native control
    /// </summary>
    /// <param name="sender">Sender.</param>
    /// <param name="e">E.</param>
    private void CheckBoxCheckedChange(object sender, CompoundButton.CheckedChangeEventArgs e)
    {
        Element.IsChecked = e.IsChecked;
    }


    private ColorStateList GetBackgroundColorStateList(Color color)
    {
        return new ColorStateList(
            new[]
            {
                new[] {-global::Android.Resource.Attribute.StateEnabled}, // checked
                new[] {-global::Android.Resource.Attribute.StateChecked}, // unchecked
                new[] {global::Android.Resource.Attribute.StateChecked} // checked
            },
            new int[]
            {
                color.WithSaturation(0.1).ToAndroid(),
                color.ToAndroid(),
                color.ToAndroid()
            });
    }

}

This is basically just setting up the ColorStateList for the control based on the colors from the controls and then wiring up the state to and events to the Xamarin.Forms control we created and the native Android Checkbox.

Now let’s look at iOS.

iOS Checkbox Renderer

Unlike Android, iOS does NOT have any form of a Checkbox control. The most common workaround for this is to use a simple image of a check and a square and interchange them and manage the state. But we want more flexibility, animations, and all the fun stuff that comes with a fully built control.

Here’s how we solved this issue for this particular set of Controls – using the BEMCheckBox.

BEMCheckBox is a third party control from Boris-Em and our lovely Xamarin.Community has already created Bindings for it AND a NuGet package. Here are the links:

Be sure to install this NuGet package in your iOS project, and then we can get to work on the renderer:

iOSCheckboxRenderer.cs

using System;
using SaturdayMP.XPlugins.iOS;
using Xamarin.Forms;
using Xamarin.Forms.Platform.iOS;
...

/// <summary>
/// Xamarin.Forms custom renderer for the Checkbox control
/// </summary>
public class CheckboxRenderer : ViewRenderer<Checkbox, BEMCheckBox>
{
    private const int DEFAULT_SIZE = 28;

    /// <summary>
    /// Used for registration with dependency service to ensure it isn't linked out
    /// </summary>
    public static void Initialize()
    {
        // intentionally empty
    }


    public override SizeRequest GetDesiredSize(double widthConstraint, double heightConstraint)
    {
        var sizeConstraint = base.GetDesiredSize(widthConstraint, heightConstraint);

        if (sizeConstraint.Request.Width == 0)
        {
            var width = widthConstraint;
            if (widthConstraint <= 0)
            {
                System.Diagnostics.Debug.WriteLine("Default values");
                width = DEFAULT_SIZE;
            }
            else if (widthConstraint <= 0)
            {
                width = DEFAULT_SIZE;
            }

            sizeConstraint = new SizeRequest(new Size(width, sizeConstraint.Request.Height),
                new Size(width, sizeConstraint.Minimum.Height));
        }

        return sizeConstraint;
    }


    /// <summary>
    /// Called when the control is created or changed
    /// </summary>
    /// <param name="e">E.</param>
    protected override void OnElementChanged(ElementChangedEventArgs<Checkbox> e)
    {
        base.OnElementChanged(e);
        if (e.NewElement != null)
        {
            if (Control == null)
            {
                var checkBox = new BEMCheckBox();

                checkBox.BoxType = BEMBoxType.Square;
                checkBox.OnAnimationType = BEMAnimationType.Fill;
                checkBox.OffAnimationType = BEMAnimationType.Fill;

                // set default colors
                UpdateColors(checkBox);

                SetNativeControl(checkBox);
            }

            Control.On = e.NewElement.IsChecked;
            Control.ValueChanged += Control_ValueChanged;
        }
    }

    protected override void OnElementPropertyChanged(object sender, System.ComponentModel.PropertyChangedEventArgs e)
    {
        base.OnElementPropertyChanged(sender, e);
        if(e.PropertyName == nameof(Element.IsChecked))
        {
            Control.On = Element.IsChecked; 
        }
        else
        {
            UpdateColors(Control);
        }
    }

    void Control_ValueChanged(object sender, EventArgs e)
    {
        Element.IsChecked = Control.On;
        Element.CheckedCommand?.Execute(Element.CheckedCommandParameter);
    }

    private void UpdateColors(BEMCheckBox nativeCheckBox)
    {
        nativeCheckBox.TintColor = Element.OutlineColor.ToUIColor();
        nativeCheckBox.OffFillColor = Element.InnerColor.ToUIColor();
        nativeCheckBox.OnFillColor = Element.CheckedInnerColor.ToUIColor();
        nativeCheckBox.OnTintColor = Element.CheckedOutlineColor.ToUIColor();
        nativeCheckBox.OnCheckColor = Element.CheckColor.ToUIColor();
    }
}

We follow the same sort of pattern as we did with the Android renderer, but this time we use the BEMCheckBox and wire up the colors, animation styles (which you can change to whatever you want), and setup the events and state.

Using the CheckBox

Now we can use this in our XAML with bindings and styles and everything. We can use it in lists for multi select, or anywhere else!

MainPage.xaml

...
 <StackLayout Orientation="Horizontal" Spacing="16">
    <components:Checkbox CheckedCommandParameter="{Binding .}" IsChecked="{Binding UseExistingAddress}" VerticalOptions="Center" OutlineColor="{DynamicResource PrimaryTextColor}" CheckedOutlineColor="{DynamicResource PrimaryTextColor}" CheckColor="{DynamicResource PrimaryColor}"  WidthRequest="{StaticResource CheckboxSize}" HeightRequest="{StaticResource CheckboxSize}"/>
    <Label Text="Use existing address" VerticalOptions="Center" Style="{DynamicResource BodySecondary}"/>
</StackLayout>
...

See how good it looks?

iOS with empty fill:
Screen Shot 2018-04-09 at 12.05.31 PM
Screen Shot 2018-04-09 at 12.03.19 PM

Android with fill:
Screen Shot 2018-04-09 at 12.05.24 PM
Screen Shot 2018-04-09 at 12.03.40 PM


If you like what you see, don’t forget to follow me on twitter @Suave_Pirate, check out my GitHub, and subscribe to my blog to learn more mobile developer tips and tricks!

Interested in sponsoring developer content? Message @Suave_Pirate on twitter for details.

Xamarin.Tip – Borderless Inputs

I published multiple posts this week about creating Xamarin.Forms controls without borders using Custom renderers. This post is your one stop shop for all these posts. These are the controls that are used in my repository to create Material Design inputs in Xamarin.Forms that you can find here:
https://github.com/SuavePirate/SuaveControls.MaterialFormControls. These will be talked about in posts to come!
Check the borderless controls out here:

  1. Xamarin.Forms Borderless Entry
  2. Xamarin.Forms Borderless Picker
  3. Xamarin.Forms Borderless DatePicker
  4. Xamarin.Forms Borderless TimePicker
  5. Xamarin.Forms Borderless Editor

And check out how they look here:

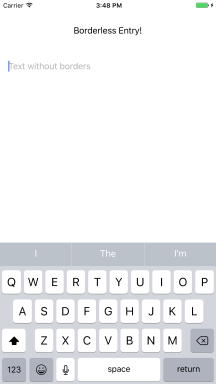
BorderlessEntry


BorderlessEditor

BorderlessPicker

BorderlessDatePicker

BorderlessTimePicker

If you like what you see, don’t forget to follow me on twitter @Suave_Pirate, check out my GitHub, and subscribe to my blog to learn more mobile developer tips and tricks!

Interested in sponsoring developer content? Message @Suave_Pirate on twitter for details.

Xamarin.Controls – Creating your own Markdown TextBlock in UWP

After talking about using the MarkdownTextView I created and how to accomplish rendering Markdown in iOS and Android without a WebView, I received a few requests to do it for UWP as well.

Check these previous posts out:

  1. Xamarin.Controls – MarkdownTextView
  2. Xamarin.Controls – Creating Your Own Android Markdown TextView
  3. Xamarin.Controls – Creating Your Own iOS Markdown UILabel

Let’s dive in to rendering markdown into a TextBlock in UWP. We’ll break it down into a few steps:

  1. Parse a markdown string into an html string
  2. Create a Behavior for the TextBlock
  3. Parse the html into relevant Span tags in the behavior
  4. Use the new Behavior in our XAML or C#


Parsing Markdown

This is traditionally the most difficult part. However, our community is awesome and open sourced a Markdown processor with an MIT license (so use it freely!).

I won’t put the actual code in here because it is overwhelmingly long, but here is a link to it:

https://github.com/SuavePirate/MarkdownTextView/blob/master/src/Forms/SPControls.MarkdownTextView/SPControls.MarkdownTextView/Markdown.cs

Note that this is portable, so you can use it in a PCL without a problem and share it between your platforms.

Now that we have our means of processing the Markdown, let’s create some extension methods to make it easier to parse and do some extra processing like cleaning up our tags, line breaks, etc.

#region MARKDOWN STYLES
private const string ORIGINAL_PATTERN_BEGIN = "<code>";
private const string ORIGINAL_PATTERN_END = "</code>";
private const string PARSED_PATTERN_BEGIN = "<font color=\"#888888\" face=\"monospace\"><tt>";
private const string PARSED_PATTERN_END = "</tt></font>";

#endregion

public static string ToHtml(this string markdownText)
{
    var markdownOptions = new MarkdownOptions
    {
        AutoHyperlink = true,
        AutoNewlines = false,
        EncodeProblemUrlCharacters = false,
        LinkEmails = true,
        StrictBoldItalic = true
    };
    var markdown = new Markdown(markdownOptions);
    var htmlContent = markdown.Transform(markdownText);
    var regex = new Regex("\n");
    htmlContent = regex.Replace(htmlContent, "
");

    var html = htmlContent.HtmlWrapped();
    var regex2 = new Regex("\r");
    html = regex.Replace(html, string.Empty);
    html = regex2.Replace(html, string.Empty);
    return html;
}

///
<summary>
/// Wrap html with a full html tag
/// </summary>
/// <param name="html"></param>
/// <returns></returns>
public static string HtmlWrapped(this string html)
{
    if (!html.StartsWith("<html>") || !html.EndsWith("</html>"))
    {
        html = $"<html><body>{html}</body></html>";
    }
    return html;
}

///<summary>
/// Parses html with code or pre tags and gives them proper
/// styled spans so that Android can parse it properly
/// </summary>
/// <param name="htmlText">The html string</param>
/// <returns>The html string with parsed code tags</returns>
public static string ParseCodeTags(this string htmlText)
{
    if (htmlText.IndexOf(ORIGINAL_PATTERN_BEGIN) < 0) return htmlText;
    var regex = new Regex(ORIGINAL_PATTERN_BEGIN);
    var regex2 = new Regex(ORIGINAL_PATTERN_END);

    htmlText = regex.Replace(htmlText, PARSED_PATTERN_BEGIN);
    htmlText = regex2.Replace(htmlText, PARSED_PATTERN_END);
    htmlText = htmlText.TrimLines();
    return htmlText;
}

public static bool EqualsIgnoreCase(this string text, string text2)
{
    return text.Equals(text2, StringComparison.CurrentCultureIgnoreCase);
}

public static string ReplaceBreaks(this string html)
{
    var regex = new Regex("
");
    html = regex.Replace(html, "\n");
    return html;
}

public static string ReplaceBreaksWithSpace(this string html)
{
    var regex = new Regex("
");
    html = regex.Replace(html, " ");
    return html;
}

public static string TrimLines(this string originalString)
{
    originalString = originalString.Trim('\n');
    return originalString;
}

Now we can properly parse markdown to html:

var markdown = "# Hello *World*";
var html = markdown.ToHtml();
// html = "<h1>Hello <strong>World</strong></h1>"

Create a Behavior

I’m going to take some inspiration from Shawn Kendrot and his post here.

The first thing Shawn does is implement a base Behavior class, so let’s go ahead and use that here:

    // WinRT Implementation of the base Behavior classes
    public abstract class Behavior<T> : Behavior where T : DependencyObject
    {
        protected T AssociatedObject
        {
            get { return base.AssociatedObject as T; }
        }

        protected override void OnAttached()
        {
            base.OnAttached();
            if (this.AssociatedObject == null) throw new InvalidOperationException("AssociatedObject is not of the right type");
        }
    }

    public abstract class Behavior : DependencyObject, IBehavior
    {
        public void Attach(DependencyObject associatedObject)
        {
            AssociatedObject = associatedObject;
            OnAttached();
        }

        public void Detach()
        {
            OnDetaching();
        }

        protected virtual void OnAttached()
        {

        }

        protected virtual void OnDetaching()
        {

        }

        protected DependencyObject AssociatedObject { get; set; }

        DependencyObject IBehavior.AssociatedObject
        {
            get { return this.AssociatedObject; }
        }
    }

Now we can create our actual Behavior implementation to handle the html parsing. If you want the entire file, you can find it in a gist here. Or keep reading so we can break it down.

HtmlTextBehavior.cs

public class HtmlTextBehavior : Behavior<TextBlock>
{
    protected override void OnAttached()
    {
        base.OnAttached();
        AssociatedObject.Loaded += OnAssociatedObjectLoaded;
        AssociatedObject.LayoutUpdated += OnAssociatedObjectLayoutUpdated;
    }
 
    protected override void OnDetaching()
    {
        base.OnDetaching();
        AssociatedObject.Loaded -= OnAssociatedObjectLoaded;
        AssociatedObject.LayoutUpdated -= OnAssociatedObjectLayoutUpdated;
    }
 
    private void OnAssociatedObjectLayoutUpdated(object sender, object o)
    {
        UpdateText();
    }
 
    private void OnAssociatedObjectLoaded(object sender, RoutedEventArgs routedEventArgs)
    {
        UpdateText();
        AssociatedObject.Loaded -= OnAssociatedObjectLoaded;
    }
 
    private void UpdateText()
    {
        if (AssociatedObject == null) return;
        if (string.IsNullOrEmpty(AssociatedObject.Text)) return;

        string text = AssociatedObject.Text;

        // Just incase we are not given text with elements.
        string modifiedText = string.Format("<div>{0}</div>", text);

        // reset the text because we will add to it.
        AssociatedObject.Inlines.Clear();
        try
        {
            var element = XElement.Parse(modifiedText);
            ParseText(element, AssociatedObject.Inlines);
        }
        catch (Exception)
        {
            // if anything goes wrong just show the html
            AssociatedObject.Text = text;
        }
        AssociatedObject.LayoutUpdated -= OnAssociatedObjectLayoutUpdated;
        AssociatedObject.Loaded -= OnAssociatedObjectLoaded;
    }
    
    /// <summary>
    /// Traverses the XElement and adds text to the InlineCollection.
    /// </summary>
    /// <param name="element"></param>
    /// <param name="inlines"></param>
    private static void ParseText(XElement element, InlineCollection inlines)
    {
        if (element == null) return;

        InlineCollection currentInlines = inlines;
        var elementName = element.Name.ToString().ToUpper();
        switch (elementName)
        {
            case ElementA:
                var link = new Hyperlink();
                var href = element.Attribute("href");
                if(href != null)
                {
                    try
                    {
                        link.NavigateUri = new Uri(href.Value);
                    }
                    catch (System.FormatException) { /* href is not valid */ }
                }
                inlines.Add(link);
                currentInlines = link.Inlines;
                break;
            case ElementB:
            case ElementStrong:
                var bold = new Bold();
                inlines.Add(bold);
                currentInlines = bold.Inlines;
                break;
            case ElementI:
            case ElementEm:
                var italic = new Italic();
                inlines.Add(italic);
                currentInlines = italic.Inlines;
                break;
            case ElementU:
                var underline = new Underline();
                inlines.Add(underline);
                currentInlines = underline.Inlines;
                break;
            case ElementBr:
                inlines.Add(new LineBreak());
                break;
            case ElementP:
                // Add two line breaks, one for the current text and the second for the gap.
                if (AddLineBreakIfNeeded(inlines))
                {
                    inlines.Add(new LineBreak());
                }

                Span paragraphSpan = new Span();
                inlines.Add(paragraphSpan);
                currentInlines = paragraphSpan.Inlines;
                break;
            // TODO: Add ElementH1 - ElementH6 handlers here. They should behave the same way as ElementP with increased font size.
            case ElementLi:
                inlines.Add(new LineBreak());
                inlines.Add(new Run { Text = " • " });
                break;
            case ElementUl:
            case ElementDiv:
                AddLineBreakIfNeeded(inlines);
                Span divSpan = new Span();
                inlines.Add(divSpan);
                currentInlines = divSpan.Inlines;
                break;
        }
        foreach (var node in element.Nodes())
        {
            XText textElement = node as XText;
            if (textElement != null)
            {
                currentInlines.Add(new Run { Text = textElement.Value });
            }
            else
            {
                ParseText(node as XElement, currentInlines);
            }
        }
        // Add newlines for paragraph tags
        if (elementName == ElementP)
        {
            currentInlines.Add(new LineBreak());
        }
    }
    /// <summary>
    /// Check if the InlineCollection contains a LineBreak as the last item.
    /// </summary>
    /// <param name="inlines"></param>
    /// <returns></returns>
    private static bool AddLineBreakIfNeeded(InlineCollection inlines)
    {
        if (inlines.Count > 0)
        {
            var lastInline = inlines[inlines.Count - 1];
            while ((lastInline is Span))
            {
                var span = (Span)lastInline;
                if (span.Inlines.Count > 0)
                {
                    lastInline = span.Inlines[span.Inlines.Count - 1];
                }
            }
            if (!(lastInline is LineBreak))
            {
                inlines.Add(new LineBreak());
                return true;
            }
        }
        return false;
    }
}

That’s a lot of stuff to look at. Let’s break it down. The core of the processing is in the UpdateText and ParseText methods.

Essentially what we are doing here is some layout management, and then parsing the html (parsed into an XElement). It’s different from the approaches we took in Android and iOS where there are native APIs that can parse HTML automatically. But if you looked at the Android post I made before, you’ll remember the extra TagHandler we created that took unsupported html element types and parsed them into Spans for proper formatting. What we did in that situation is a simplified version of what we accomplish here. We take relevant html tags, and create Spans, Bolds, HyperLinks and other relevant types in order to be able to render it within our final TextBlock.

There are a few element types in the parsing that are not included, but can be pretty easily added. For example, code, pre, h1h6, etc. However, these can be easily added to the switch statement! Most of these are going to be handled the same way that ElementP does. So you can add them, and adjust the FontSize or FontFamily of your Span!

Applying the Behavior

Now that we have our HtmlTextBehavior built out, we can apply it to our actual TextBlock!

In XAML:

<TextBlock Text="{Binding MyHtmlText}" FontSize="20" TextWrapping="Wrap">
    <Interactivity:Interaction.Behaviors>
        <local:HtmlTextBehavior />
    </Interactivity:Interaction.Behaviors>
</TextBlock>

Now we can render out MyHtmlText property from our ViewModel directly in our TextBlock!

Xamarin.Tips – Create a Bindable Picker in Xamarin.Forms

EDIT: I forgot to mention, but there was a Pull Request approved and added to the Xamarin.Forms repository that is currently available in Xamarin.Forms v2.3.4-pre1 and should release with the next major update. https://developer.xamarin.com/releases/xamarin-forms/xamarin-forms-2.3/2.3.4-pre1/

It’s unfortunate that Xamarin.Forms’ Picker does not ship with any ability to bind the options. To get around this, we can create a pretty simple control: The BindablePicker

public partial class BindablePicker : Picker
{
    public BindablePicker()
    {
    InitializeComponent();
    this.SelectedIndexChanged += OnSelectedIndexChanged;
    }

    public static BindableProperty ItemsSourceProperty = BindableProperty.Create("ItemsSource", typeof(IEnumerable), typeof(BindablePicker), default(IEnumerable), propertyChanged: OnItemsSourceChanged);

    public static BindableProperty SelectedItemProperty = BindableProperty.Create("SelectedItem", typeof(object), typeof(BindablePicker), default(object), propertyChanged: OnSelectedItemChanged);
    public IEnumerable ItemsSource
    {
        get { return (IEnumerable)GetValue(ItemsSourceProperty); }
        set { SetValue(ItemsSourceProperty, value); }
    }

    public object SelectedItem
    {
        get { return (object)GetValue(SelectedItemProperty); }
        set { SetValue(SelectedItemProperty, value); }
    }

    private static void OnItemsSourceChanged(BindableObject bindable, object oldvalue, object newvalue)
    {
        var picker = bindable as BindablePicker;
        picker.Items.Clear();
        if (newvalue != null)
        {

            foreach (var item in (IEnumerable)newvalue)
            {
                picker.Items.Add(item.ToString());
            }
        }

        // TODO: Add more methods for removing items here
    }

    private void OnSelectedIndexChanged(object sender, EventArgs eventArgs)
    {
        if (SelectedIndex &lt; 0 || SelectedIndex &gt; Items.Count - 1)
        {
            SelectedItem = null;
        }
        else
        {
            SelectedItem = Items[SelectedIndex];
        }
    }
    private static void OnSelectedItemChanged(BindableObject bindable, object oldvalue, object newvalue)
    {
        var picker = bindable as BindablePicker;
        if (newvalue != null)
        {
            picker.SelectedIndex = picker.Items.IndexOf(newvalue.ToString());
        }
    }
}

Then you can use the picker in your XAML like so:

<views:BindablePicker ItemsSource="{Binding TypeList}" Title="Type" SelectedItem="{Binding CurrentType}"/>;

intellitect.com also has a great post on how to do something similar to allow for an enum to be bound to the options.

Creating a Circular Image in XAML

Here is a freeby – my preference for creating circular images in XAML:


<Grid x:Name="SingleImageContainer">
    <Ellipse Height="60" Width="60">
        <Ellipse.Fill>
            <ImageBrush ImageSource="{Binding MyImageUri}" AlignmentX="Center" AlignmentY="Center" />
        </Ellipse.Fill>
    </Ellipse>
 </Grid>

circle (sorry for the bad cropping)

Databinding a Windows FlipView with MVVM Light

MVVM Light is a great cross-platform MVVM Framework, and was chosen to be used in this example. However, it isn’t required to get the same results.

FlipViews were a great addition to the WIndows Control family for Windows Phone and Windows Store applications. It’s easily customized, simple to use, and can give your app a user friendly experience for anything from an image gallery, to a news reader. So let’s get to the code.

Let’s first build the model we are going to use for each of our views in our FlipView. I’m using a PCL for my Models and ViewModels and a Windows Phone 8.1 project for the xaml, but it works in the same fashion for Windows Store.

Here is our model:


public class RotatorItem
 {
     public string Title { get; set; }
     public string ImageUri { get; set; }
     public string Subtitle { get; set; }
 }

Now let’s look at a simple ViewModel with MVVM Light to hold our collection of SimpleRotatorItems.

public class LandingRotatorPageViewModel : ViewModelBase
 {
     #region Private Properties
     private ObservableCollection<RotatorItem> _rotatorItems;
     private RotatorItem _activeItem;
     #endregion

     #region Public Properties
     public ObservableCollection<RotatorItem> RotatorItems
     {
         get
         {
             return _rotatorItems;
         }
         set
         {
             Set(() => RotatorItems, ref _rotatorItems, value);
         }
     }
     public RotatorItem ActiveItem
     {
         get
         {
             return _activeItem;
         }
         set
         {
             Set(() => ActiveItem, ref _activeItem, value);
         }
     }

     #endregion
     public LandingRotatorPageViewModel()
     {
         var rotatorItems = new ObservableCollection<RotatorItem>();
         rotatorItems.Add(new RotatorItem { ImageUri = "/Assets/Logo.scale-240.png", Title = "Title 1", Subtitle = "Subtitle 1"});
         rotatorItems.Add(new RotatorItem { ImageUri = "/Assets/Logo.scale-240.png", Title = "Title 2", Subtitle = "Subtitle 2" });
         rotatorItems.Add(new RotatorItem { ImageUri = "/Assets/Logo.scale-240.png", Title = "Title 3", Subtitle = "Subtitle 3" });
         rotatorItems.Add(new RotatorItem { ImageUri = "/Assets/Logo.scale-240.png", Title = "Title 4", Subtitle = "Subtitle 4" });
         RotatorItems = rotatorItems;
         ActiveItem = rotatorItems.First();
     }
 }

Let’s go ahead now and get our markup done for our page with the FlipView:

<FlipView x:Name="SimpleFlipView" ItemsSource="{Binding RotatorItems}" Grid.Row="1" SelectionChanged="FlipView_SelectionChanged">
    <FlipView.ItemTemplate>
        <DataTemplate>
            <Grid>
                <Grid.RowDefinitions>
                    <RowDefinition Height="200" />
                    <RowDefinition Height="120" />
                    <RowDefinition Height="80" />
                </Grid.RowDefinitions>
                <Image Source="{Binding ImageUri}" Height="150" Grid.Row="0" VerticalAlignment="Top" Margin="0,50,0,0"/>
                <TextBlock TextWrapping="Wrap" TextAlignment="Center" Grid.Row="1" Text="{Binding Title}" FontSize="30" HorizontalAlignment="Center" Margin="20"></TextBlock>
                <TextBlock TextWrapping="Wrap" TextAlignment="Center" Grid.Row="2" FontSize="20" HorizontalAlignment="Center" Margin="20">
                    <Run Text="{Binding Subtitle}"></Run>
               </TextBlock>

            </Grid>
       </DataTemplate>
   </FlipView.ItemTemplate>
</FlipView>

Last but not least, let’s make sure our ViewModel is bound to our Page in our page Class:

 public sealed partial class MainPage : Page
 {
     private LandingRotatorPageViewModel _vm;
     public MainPage()
     {
          this.InitializeComponent();

          _vm = new LandingRotatorPageViewModel();
          this.DataContext = _vm;
     }

     /// <summary>
     /// Invoked when this page is about to be displayed in a Frame.
     /// </summary>
     /// <param name="e">Event data that describes how this page was reached.
     /// This parameter is typically used to configure the page.</param>
     protected override void OnNavigatedTo(NavigationEventArgs e)
     {
     }
}

Now that the Page’s DataContext is set to our ViewModel, the binding we placed on the FlipView element ‘ItemSource=”{Binding RotatorItems}”‘ will bind our FlipView’s Items to the items we created in the constructor for our ViewModel, and will use our ItemTemplate to create our items from the fields on the RotatorItems.

Now let’s take a look at our final result:

FlipView Item
First FlipView Item bound to ViewModel
wp_ss_20150502_0002
Second FlipView Item

So there you have it. An easy solution to using the Windows FlipView Control to display content that is bound to a ViewModel.