Xamarin.NuGet – Xamarin.Forms Dynamic Bindable StackLayout

I recently released a component I commonly use in my Xamarin.Forms applications for binding data to a wrapping layout here: Xamarin.NuGet – DynamicWrapLayout Announcement! In the spirit of this type of control, I’ve also released a new NuGet package for a bindable DynamicStackLayout. It’s a simple control that allows you to create a StackLayout and bind an ItemsSource collection and an ItemTemplate. This is useful for smaller, but dynamic collections with the use of the orientation changing of a StackLayout. This means you could have a horizontally scrolling list of cards, bind the orientation or change it to vertical, and play with positioning more easily than using a ListView. I would still highly suggest using a ListView over this control for a standard vertical stack of dynamic content since this control does NOT use any view recycling or virtualization which can cause performance issues with large collections or constantly changing collection.

Get it here

NuGet: https://www.nuget.org/packages/DynamicStackLayout

Github: https://github.com/SuavePirate/DynamicStackLayout

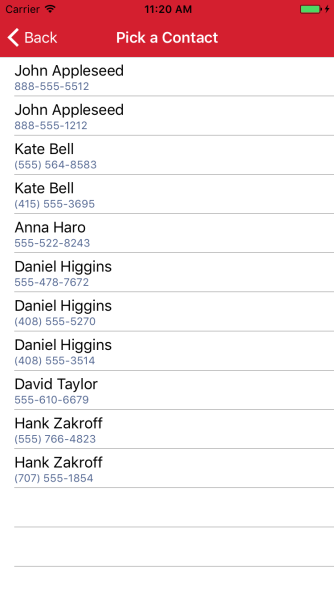
In the end, you get something like this!

Be sure to read the documentation below:

DynamicStackLayout

A Xamarin.Forms layout for creating dynamically wrapped views. Inspired by the WrapLayout example: https://developer.xamarin.com/samples/xamarin-forms/UserInterface/CustomLayout/WrapLayout/

Installation

It’s on NuGet! https://www.nuget.org/packages/DynamicStackLayout/

Install-Package DynamicStackLayout

Be sure to install in all projects that use it.

Usage

There are two key properties that make this control useful – the ItemsSource (like a ListView) and the ItemTemplate (although, you can also just add children to the view – it does both!)
Be sure to wrap it in a ScrollView though

XAML

Add the xmlns:

xmlns:suave="clr-namespace:SuaveControls.DynamicStackLayout;assembly=SuaveControls.DynamicStackLayout"

Use it in your View:

<ScrollView>
    <suave:DynamicStackLayout ItemsSource="{Binding Items}" HorizontalOptions="Fill">
        <suave:DynamicStackLayout.ItemTemplate>
            <DataTemplate>
                <StackLayout BackgroundColor="Gray" WidthRequest="120" HeightRequest="180">
                    <Label Text="{Binding .}" VerticalOptions="FillAndExpand" HorizontalOptions="FillAndExpand" VerticalTextAlignment="Center" HorizontalTextAlignment="Center" />
                </StackLayout>
            </DataTemplate>
        </suave:DynamicStackLayout.ItemTemplate>
    </suave:DynamicStackLayout>
</ScrollView>

Don’t like data-binding and want to just use child views? You can do that too!

<ScrollView>
    <suave:DynamicStackLayout HorizontalOptions="Fill">
      <StackLayout BackgroundColor="Gray" WidthRequest="120" HeightRequest="180">
          <Label Text="0" TextColor="White" VerticalOptions="FillAndExpand" HorizontalOptions="FillAndExpand" VerticalTextAlignment="Center" HorizontalTextAlignment="Center" />
      </StackLayout>
      <StackLayout BackgroundColor="Gray" WidthRequest="120" HeightRequest="180">
          <Label Text="1" TextColor="White" VerticalOptions="FillAndExpand" HorizontalOptions="FillAndExpand" VerticalTextAlignment="Center" HorizontalTextAlignment="Center" />
      </StackLayout>
      <StackLayout BackgroundColor="Gray" WidthRequest="120" HeightRequest="180">
          <Label Text="2" TextColor="White" VerticalOptions="FillAndExpand" HorizontalOptions="FillAndExpand" VerticalTextAlignment="Center" HorizontalTextAlignment="Center" />
      </StackLayout>
      <StackLayout BackgroundColor="Gray" WidthRequest="120" HeightRequest="180">
          <Label Text="3" TextColor="White" VerticalOptions="FillAndExpand" HorizontalOptions="FillAndExpand" VerticalTextAlignment="Center" HorizontalTextAlignment="Center" />
      </StackLayout>
      <StackLayout BackgroundColor="Gray" WidthRequest="120" HeightRequest="180">
          <Label Text="4" TextColor="White" VerticalOptions="FillAndExpand" HorizontalOptions="FillAndExpand" VerticalTextAlignment="Center" HorizontalTextAlignment="Center" />
      </StackLayout>
    </suave:DynamicStackLayout>
</ScrollView>

Features

  • Bindable child views
  • Bindable to collections
  • Handles layout changing well (try rotating the device)
  • Doesn’t require custom renderers (All Xamarin.Forms baby!)

Notes

This does not use any native view virtualization, which means performance does not scale well with extremely large data sets.

Coming soon

  • ItemSelected event and SelectedItem bindable property (for now, you can add custom gestures and commands to your DataTemplate and handle the events yourself)
  • Better Collection Updating


If you like what you see, don’t forget to follow me on twitter @Suave_Pirate, check out my GitHub, and subscribe to my blog to learn more mobile developer tips and tricks!

Interested in sponsoring developer content? Message @Suave_Pirate on twitter for details.

Advertisement

Xamarin.NuGet – DynamicWrapLayout Announcement!

It’s been a little while since I’ve posted about any new Xamarin Controls or updates, but here’s a great one!

I needed to create a layout that could bind to a collection of data in Xamarin.Forms that fit to a dynamic grid that also scaled to larger devices and orientation changes. I thought about creating a new custom renderer that uses the RecyclerView with a GridLayoutManager and a UICollectionView with a custom layout. However, I didn’t need to bind to tons of data, so I decided to create a new control that is entirely Xamarin.Forms – No custom renderers!

I’ve called it the DynamicWrapLayout since it was inspired by the WrapLayout from Charles Petzold and David Britch.

Get it on NuGet: https://www.nuget.org/packages/DynamicWrapLayout/
Get the source on GitHub: https://github.com/SuavePirate/DynamicWrapLayout

Because it is all Xamarin.Forms, it should work on all the platforms that Forms supports! So use it everywhere! I’ll create another post about how I built it if you want to work on your own implementation, but for now, you can read the documentation on the control below.

Documentation

DynamicWrapLayout

A Xamarin.Forms layout for creating dynamically wrapped views. Inspired by the WrapLayout example: https://developer.xamarin.com/samples/xamarin-forms/UserInterface/CustomLayout/WrapLayout/

Installation

It’s on NuGet! https://www.nuget.org/packages/DynamicWrapLayout/

Install-Package DynamicWrapLayout

Be sure to install in all projects that use it.

Usage

There are two key properties that make this control useful – the ItemsSource (like a ListView) and the DataTemplate (although, you can also just add children to the view – it does both!)
Be sure to wrap it in a ScrollView though

XAML

Add the xmlns:

xmlns:suave="clr-namespace:SuaveControls.DynamicWrapLayout;assembly=SuaveControls.DynamicWrapLayout"

Use it in your View:

<ScrollView>
    <suave:DynamicWrapLayout ItemsSource="{Binding Items}" HorizontalOptions="Fill">
        <suave:DynamicWrapLayout.ItemTemplate>
            <DataTemplate>
                <StackLayout BackgroundColor="Gray" WidthRequest="120" HeightRequest="180">
                    <Label Text="{Binding .}" TextColor="White" VerticalOptions="FillAndExpand" HorizontalOptions="FillAndExpand" VerticalTextAlignment="Center" HorizontalTextAlignment="Center" />
                </StackLayout>
            </DataTemplate>
        </suave:DynamicWrapLayout.ItemTemplate>
    </suave:DynamicWrapLayout>
</ScrollView>

Don’t like data-binding and want to just use child views? You can do that too!

<ScrollView>
    <suave:DynamicWrapLayout HorizontalOptions="Fill">
      <StackLayout BackgroundColor="Gray" WidthRequest="120" HeightRequest="180">
          <Label Text="0" TextColor="White" VerticalOptions="FillAndExpand" HorizontalOptions="FillAndExpand" VerticalTextAlignment="Center" HorizontalTextAlignment="Center" />
      </StackLayout>
      <StackLayout BackgroundColor="Gray" WidthRequest="120" HeightRequest="180">
          <Label Text="1" TextColor="White" VerticalOptions="FillAndExpand" HorizontalOptions="FillAndExpand" VerticalTextAlignment="Center" HorizontalTextAlignment="Center" />
      </StackLayout>
      <StackLayout BackgroundColor="Gray" WidthRequest="120" HeightRequest="180">
          <Label Text="2" TextColor="White" VerticalOptions="FillAndExpand" HorizontalOptions="FillAndExpand" VerticalTextAlignment="Center" HorizontalTextAlignment="Center" />
      </StackLayout>
      <StackLayout BackgroundColor="Gray" WidthRequest="120" HeightRequest="180">
          <Label Text="3" TextColor="White" VerticalOptions="FillAndExpand" HorizontalOptions="FillAndExpand" VerticalTextAlignment="Center" HorizontalTextAlignment="Center" />
      </StackLayout>
      <StackLayout BackgroundColor="Gray" WidthRequest="120" HeightRequest="180">
          <Label Text="4" TextColor="White" VerticalOptions="FillAndExpand" HorizontalOptions="FillAndExpand" VerticalTextAlignment="Center" HorizontalTextAlignment="Center" />
      </StackLayout>
    </suave:DynamicWrapLayout>
</ScrollView>

Features

  • Bindable child views
  • Bindable to collections
  • Handles layout changing well (try rotating the device)
  • Doesn’t require custom renderers (All Xamarin.Forms baby!)

What does this thing look like?

Android:


iOS:


Notes

This does not use any native view virtualization, which means performance does not scale well with extremely large data sets.

Coming soon

  • ItemSelected event and SelectedItem bindable property (for now, you can add custom gestures and commands to your DataTemplate and handle the events yourself)
     

If you like what you see, don’t forget to follow me on twitter @Suave_Pirate, check out my GitHub, and subscribe to my blog to learn more mobile developer tips and tricks!

Interested in sponsoring developer content? Message @Suave_Pirate on twitter for details.

Xamarin.iOS RKNotificationHub NuGet Announcement!

More awesome iOS controls coming our way as Xamarin developers! I’ve gone ahead and added another UI control to NuGet which is an incredibly useful little notification manager to add badges to any control or any frame in our view.

Check out the NuGet and GitHub project:

NuGet: https://www.nuget.org/packages/RKNotificationHub/
GitHub: https://github.com/SuavePirate/Xamarin-RKNotificationHub

Documentation


Xamarin RKNotificationHub

A Xamarin.iOS library for adding badges to any UIView, UIBarButtonItem, or position on the screen. You can also animate your badges!

Installation

Use NuGet!
Install-Package RKNotificationHub
https://www.nuget.org/packages/RKNotificationHub/

Usage

Once installed, create an RKNotificationHub.

var hub = new RKNotificationHub.RKNotificationHub(myView);
// or...
var hub = new RKNotificationHub.RKNotificationHub(myUIBarButtonItem);
// or...
var hub = new RKNotificationHub.RKNotificationHub();

You can then set or change the view or position of the circle:

hub.SetView(myView);
hub.SetCircleAtFrame(myFrame);

You can also set the color:

hub.SetCircleColor(circleColor, labelColor);

Then you can change the value of the notifcation:

hub.Increment();
hub.IncrementBy(10);
hub.Decrement();
hub.DecrementBy(10);
hub.HideCount();
hub.ShowCount();

And of course you can play with styles and animations!

hub.Bump();
hub.Blink();
hub.Pop();
hub.MoveCircleByX(x,y);
hub.ScaleCircleSizeBy(3);

If you like what you see, don’t forget to follow me on twitter @Suave_Pirate, check out my GitHub, and subscribe to my blog to learn more mobile developer tips and tricks!

Interested in sponsoring developer content? Message @Suave_Pirate on twitter for details.

Xamarin.iOS UITextField Shaker NuGet Announcement!

Shake up those text boxes with the newest UITextFieldShaker now available on NuGet!

This is a Xamarin.iOS Binding Library around a popular iOS extension called UITextField+Shake developed by Andrea Mazzini.

Check out the binding GitHub here: https://github.com/SuavePirate/UITextFieldShaker
And the NuGet here: https://www.nuget.org/packages/UITextFieldShaker/

UITextFieldShaker

Be sure to check out the documentation here or on GitHub:

Documentation


UITextFieldShaker

A Xamarin.iOS Binding implementation of the UITextField+Shaker extension.

Installation

Use NuGet!

Install-Package UITextFieldShaker

https://www.nuget.org/packages/UITextFieldShaker

Usage

Simply include the namespace, and start calling Shake() on your UITextFields!

MyTextField.Shake();

There are a number of overloads to allow you to choose how many times it shakes, the delta between shakes, add an action when the shaking is done, choose the direction it shakes, and more.

void Shake();
void Shake(int times, nfloat delta);
void Shake(int times, nfloat delta, Action handler);
void Shake(int times, nfloat delta, double interval);
void Shake(int times, nfloat delta, double interval, Action handler);
void Shake(int times, nfloat delta, double interval, ShakeDirection shakeDirection);
void Shake(int times, nfloat delta, double interval, ShakeDirection shakeDirection, Action handler);

Start Shaking!


If you like what you see, don’t forget to follow me on twitter @Suave_Pirate, check out my GitHub, and subscribe to my blog to learn more mobile developer tips and tricks!

Interested in sponsoring developer content? Message @Suave_Pirate on twitter for details.

Xamarin iOS Expanding Splash View NuGet Announcement!

Here’s another fun NuGet package I’ve put up for everyone: The ExpandingSplashView is a Xamarin.iOS Binding implementation of the CBZSplashView from CallumBoddy on GitHub: https://github.com/callumboddy/CBZSplashView

It allows you to create a quick expanding view and add it to any ViewController very easily. It also allows for you to create the expanding view from either a rasterized image such as a png icon, or from a vector icon using a UIBezierPath.

Here’s the NuGet Package: https://www.nuget.org/packages/ExpandingSplashView

And the GitHub project for the binding and NuGet: https://github.com/SuavePirate/ExpandingSplashView
twitter-gif
Be sure to read the documentation either below here or on the GitHub project!

Documentation


CBZSplashView

A Xamarin.iOS implementation of the popular iOS control CBZSplashView from @callumboddy

Credit where credit is due (I just spent a couple hours fighting with the binding libraries, but @callumboddy did the real work): https://github.com/callumboddy/CBZSplashView

Installation

You can either clone the repository and reference the CBZSplashView project, or you can now use NuGet!

Install-Package ExpandingSplashView

https://www.nuget.org/packages/ExpandingSplashView

Usage

This can be used on any view, but is best suited for covering an entire UIViewController. Simply create either a CBZSplashViewCBZRasterSplashView, or CBZVectorSplashView via their constructors or the static initializer within the CBZSplashView:

var splashView = new CBZRasterSplashView(someUIImage, someUIColor);

Then add the splashview to your View:

View.Add(splashView);

Then start your animation whenever you want:

splashView.StartAnimation();

Here’s an entire ViewController class example:

using System;

using UIKit;
using CBZSplashView;

namespace Example
{
    public partial class ViewController : UIViewController
    {
        private CBZSplashView.CBZSplashView _splashView;
        protected ViewController(IntPtr handle) : base(handle)
        {
        }

        public override void ViewDidLoad()
        {
            base.ViewDidLoad();

            var icon = UIImage.FromFile("snapchatIcon.png");

            _splashView = new CBZSplashView.CBZRasterSplashView(icon, UIColor.Yellow);

            View.Add(_splashView);

        }

        public override void ViewDidAppear(bool animated)
        {
            base.ViewDidAppear(animated);

            if (_splashView != null)
                _splashView.StartAnimation();
        }
    }
}

If you like what you see, don’t forget to follow me on twitter @Suave_Pirate, check out my GitHub, and subscribe to my blog to learn more mobile developer tips and tricks!

Interested in sponsoring developer content? Message @Suave_Pirate on twitter for details.

Xamarin.Tip – Read All Contacts in iOS 2.0

This is a second post to follow Xamarin.Tip – Read All Contacts in iOS to give a more efficient alternative to interacting with the CNContact API. Check out the change in the ContactService below! Using the EnumerateContacts ensures we get contacts from all groups including non standard groups like those brought from backups or iCloud integrated contacts. It is also a newer API call that has better performance.

Since Xamarin hasn’t been working on the Xamarin.Mobile component for a while, and James Montemagno dropped support for his Contacts Plugin, if you want to access the contact APIs on each platform, you might just have to go at it yourself – or just copy this code!

iOS

Today we’ll look at getting all of the contacts in iOS and mapping them to a local shared model that any platform can ingest.

So let’s first define a simple model for our contact. This can have more models that are shared, but we will focus on the phone number and name for the sake of demonstrating.

PhoneContact.cs


    public class PhoneContact
    {
        public string FirstName { get; set; }
        public string LastName { get; set; }
        public string PhoneNumber { get; set; }

        public string Name { get => $"{FirstName} {LastName}"; }

    }

Now let’s create a service in our iOS app project that uses the CNContact API. This will be responsible for getting all of the devices contacts (whether they have come from a back up, added, or are synced through iCloud).

The breakdown of this code can be found below.

ContactService.cs

    public class ContactService
    {
       public IEnumerable<PhoneContact> GetAllContacts()
        {
            var keysTOFetch = new[] { CNContactKey.GivenName, CNContactKey.FamilyName, CNContactKey.PhoneNumbers };
            NSError error;
            //var containerId = new CNContactStore().DefaultContainerIdentifier;
            // using the container id of null to get all containers
            var contactList = new List<CNContact>();

            using (var store = new CNContactStore())
            {
                var request = new CNContactFetchRequest(keysTOFetch);
                store.EnumerateContacts(request, out error, new CNContactStoreListContactsHandler((CNContact contact, ref bool stop) => contactList.Add(contact)));
                
            }
            var contacts = new List<PhoneContact>();

            foreach (var item in contactList)
            {
                var numbers = item.PhoneNumbers;
                if (numbers != null)
                {
                    foreach (var item2 in numbers)
                    {
                        contacts.Add(new PhoneContact
                        {
                            FirstName = item.GivenName,
                            LastName = item.FamilyName,
                            PhoneNumber = item2.Value.StringValue

                        });
                    }
                }
            }
            return contacts;
        }
    
    }

Let’s breakdown what the code is doing here:

  1. Identify the properties of the contacts you want to grab – see keysToFetch
  2. Instantiate the CNContactStore and get all of the collections which will contain all of the contacts.
  3. Fetch all of the contacts from each container and add them to the master list.
  4. Loop over all of the contact data and add a new PhoneContact
    for each of the phone numbers they have. This could be done with giving a contact an IEnumerable PhoneNumbers rather than just one phone number, but in order to separate each phone number, that’s how we will do it.
  5. Return the formatted list of contacts/phone numbers

We can list this out in a UITableView, or in the case of the screenshot below, in a Xamarin.Forms ListView.

The last thing we need to do is make sure we have the permission to access the user’s contacts! We can do this by updating the info.plist with a Privacy - Contacts Usage Description property.

Screen Shot 2017-08-22 at 10.34.43 AM

Try building some other fun features into your ContactsService or selector!
– Filter the list via search
– Build a more user friendly selector without duplicating contacts
– Gather additional properties for contacts

Simulator Screen Shot Aug 21, 2017, 11.20.32 AM.png

Next we’ll look at building this same type of ContactService for Android in order to be able to gather all of the contacts on the device and follow up with using both of these services in Xamarin.Forms to create a contact picker control!

If you like what you see, don’t forget to follow me on twitter @Suave_Pirate, check out my GitHub, and subscribe to my blog to learn more mobile developer tips and tricks!

Interested in sponsoring developer content? Message @Suave_Pirate on twitter for details.

Xamarin.Meetup – “Fluxing” Up Your Apps With Alex Dunn

Join us at the Microsoft NERD Center in Cambridge for the September Boston Mobile C# User-group on September 20th!

I’ll personally be speaking about implementing the Flux design pattern in your Xamarin and other .NET applications.

https://www.meetup.com/bostonmobiledev/events/242742363/

Meeting Details

Flux is the design pattern created by Facebook in your .NET apps to build robust and manageable data-driven interfaces. Learn what Flux is, how it differs from other patterns such as MVVM and MVC, and follow along and build your first app with Flux.

About the Presenter

Alex Dunn is a software consultant and architect with a passion for mobile application development and edge technology such as machine learning, AI, IoT, and modern web. He’s a Xamarin MVP and a Microsoft MVP for .NET, and can be found giving Guest Lectures at Xamarin University or organizing Boston’s Mobile C# User-group. Follow Alex and learn how to build beautiful and robust applications.

Twitter: @Suave_Pirate
GitHub: @SuavePirate
Blog: https://alexdunn.org
Flux Resources:

Source code for demo: https://github.com/suavepirate/xamarin.flux
Xamarin University Lecture:
https://university.xamarin.com/guestlectures/architecting-your-app-with-xamarin-facebook-flux
Gone Mobile Podcast:
http://gonemobile.io/blog/e0044.fluxing.up.your.xamarin.apps.with.alex.dunn/


If you like what you see, don’t forget to follow me on twitter @Suave_Pirate, check out my GitHub, and subscribe to my blog to learn more mobile developer tips and tricks!

Interested in sponsoring developer content? Message @Suave_Pirate on twitter for details.

Xamarin.Tip – Read All Contacts in iOS

Since Xamarin hasn’t been working on the Xamarin.Mobile component for a while, and James Montemagno dropped support for his Contacts Plugin, if you want to access the contact APIs on each platform, you might just have to go at it yourself – or just copy this code!

iOS

Today we’ll look at getting all of the contacts in iOS and mapping them to a local shared model that any platform can ingest.

So let’s first define a simple model for our contact. This can have more models that are shared, but we will focus on the phone number and name for the sake of demonstrating.

PhoneContact.cs


    public class PhoneContact
    {
        public string FirstName { get; set; }
        public string LastName { get; set; }
        public string PhoneNumber { get; set; }

        public string Name { get => $"{FirstName} {LastName}"; }

    }

Now let’s create a service in our iOS app project that uses the CNContact API. This will be responsible for getting all of the devices contacts (whether they have come from a back up, added, or are synced through iCloud).

The breakdown of this code can be found below.

ContactService.cs

    public class ContactService
    {
        public IEnumerable<PhoneContact> GetAllContacts()
        {
            var keysToFetch = new[] { CNContactKey.GivenName, CNContactKey.FamilyName, CNContactKey.PhoneNumbers };
            NSError error;
            //var containerId = new CNContactStore().DefaultContainerIdentifier;
            // using the container id of null to get all containers.
            // If you want to get contacts for only a single container type, you can specify that here
            var contactList = new List<CNContact>();

            using (var store = new CNContactStore())
            {
                var allContainers = store.GetContainers(null, out error);
                foreach (var container in allContainers)
                {
                    try
                    {
                        using (var predicate = CNContact.GetPredicateForContactsInContainer(container.Identifier))
                        {
                            var containerResults = store.GetUnifiedContacts(predicate, keysToFetch, out error);
                            contactList.AddRange(containerResults);
                        }
                    }
                    catch
                    {
                        // ignore missed contacts from errors
                    }
                }
            }
            var contacts = new List<PhoneContact>();

            foreach (var item in contactList)
            {
                var numbers = item.PhoneNumbers;
                if (numbers != null)
                {
                    foreach (var item2 in numbers)
                    {
                        contacts.Add(new PhoneContact
                        {
                            FirstName = item.GivenName,
                            LastName = item.FamilyName,
                            PhoneNumber = item2.Value.StringValue

                        });
                    }
                }
            }
            return contacts;
        }
    }

Let’s breakdown what the code is doing here:

  1. Identify the properties of the contacts you want to grab – see keysToFetch
  2. Instantiate the CNContactStore and get all of the collections which will contain all of the contacts.
  3. Fetch all of the contacts from each container and add them to the master list.
  4. Loop over all of the contact data and add a new PhoneContact
    for each of the phone numbers they have. This could be done with giving a contact an IEnumerable PhoneNumbers rather than just one phone number, but in order to separate each phone number, that’s how we will do it.
  5. Return the formatted list of contacts/phone numbers

We can list this out in a UITableView, or in the case of the screenshot below, in a Xamarin.Forms ListView.

The last thing we need to do is make sure we have the permission to access the user’s contacts! We can do this by updating the info.plist with a Privacy - Contacts Usage Description property.

Screen Shot 2017-08-22 at 10.34.43 AM

Try building some other fun features into your ContactsService or selector!
– Filter the list via search
– Build a more user friendly selector without duplicating contacts
– Gather additional properties for contacts

Simulator Screen Shot Aug 21, 2017, 11.20.32 AM.png

Next we’ll look at building this same type of ContactService for Android in order to be able to gather all of the contacts on the device and follow up with using both of these services in Xamarin.Forms to create a contact picker control!

If you like what you see, don’t forget to follow me on twitter @Suave_Pirate, check out my GitHub, and subscribe to my blog to learn more mobile developer tips and tricks!

Interested in sponsoring developer content? Message @Suave_Pirate on twitter for details.

Xamarin.University – Guest Lecture Available for Free!

Xamarin University has now published my second guest lecture on WebRTC and building cross-platform voice/video conferencing apps for free! Check it out here:


And as always, find the source code on my GitHub here: https://github.com/SuavePirate/Xamarin.WebRTC

 
If you like what you see, don’t forget to follow me on twitter @Suave_Pirate, check out my GitHub, and subscribe to my blog to learn more mobile developer tips and tricks!

Interested in sponsoring developer content? Message @Suave_Pirate on twitter for details.

Xamarin.Tip – Borderless Inputs

I published multiple posts this week about creating Xamarin.Forms controls without borders using Custom renderers. This post is your one stop shop for all these posts. These are the controls that are used in my repository to create Material Design inputs in Xamarin.Forms that you can find here:
https://github.com/SuavePirate/SuaveControls.MaterialFormControls. These will be talked about in posts to come!
Check the borderless controls out here:

  1. Xamarin.Forms Borderless Entry
  2. Xamarin.Forms Borderless Picker
  3. Xamarin.Forms Borderless DatePicker
  4. Xamarin.Forms Borderless TimePicker
  5. Xamarin.Forms Borderless Editor

And check out how they look here:

BorderlessEntry


BorderlessEditor

BorderlessPicker

BorderlessDatePicker

BorderlessTimePicker

If you like what you see, don’t forget to follow me on twitter @Suave_Pirate, check out my GitHub, and subscribe to my blog to learn more mobile developer tips and tricks!

Interested in sponsoring developer content? Message @Suave_Pirate on twitter for details.